
Introduction: Why a NAS?
In a world filled with data—photos, videos, documents, and work files—the need for reliable, centralized storage has never been greater. Whether you’re a photographer, a remote worker, or a small business owner, setting up a NAS (Network Attached Storage) transforms how you store, access, and protect your data.
This guide is your complete walkthrough for NAS set up, including how to choose hardware, configure NAS storage, and optimize your home network storage setup.
By the end of this article, you’ll be ready to fully deploy your own NAS server with confidence.
What Is a NAS and Why Set One Up?
A NAS (Network Attached Storage) is a storage device connected to your home or office network. It acts as a private cloud, enabling you to:
🗂️ Store and organize large amounts of data
🔄 Share files across multiple devices
🔒 Back up data automatically
🌐 Access files remotely, anywhere in the world
Unlike external hard drives, a NAS is always online, scalable, and built with data protection in mind.
Step 1: Choose the Right NAS Hardware
Prebuilt NAS vs DIY NAS Server
| Prebuilt NAS | DIY NAS Server |
|---|---|
| Easy setup, ready out of box | Fully customizable, flexible hardware |
| Vendor software (Synology, QNAP, LincPlus) | Install any OS (TrueNAS, Unraid, OpenMediaVault) |
| Higher initial cost per TB | More cost-effective per TB |
| Limited upgrade paths | Maximum scalability |
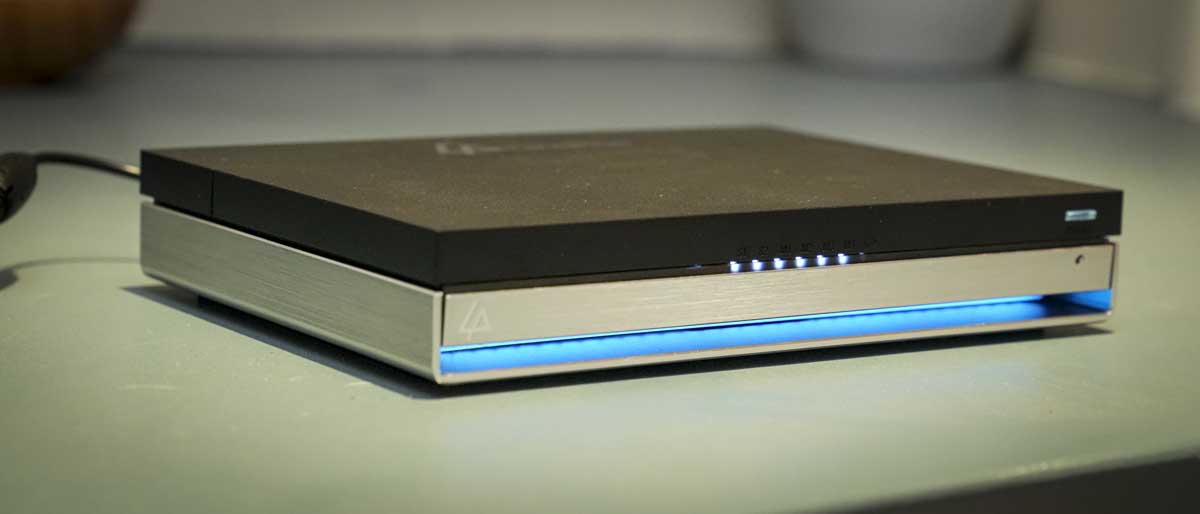
DIY-Friendly NAS Example:
LincStation N2
- CPU: Intel N100 (4-core, ultra-low power)
- Storage: 4× M.2 NVMe + 2× 2.5" SATA
- Network: 10GbE built-in
- Power: ~10-15W (energy efficient)
- Ideal for home NAS setup or small office NAS server
Step 2: Pick Your Drives — HDD or SSD?
HDD (Hard Drives):
- Cheaper per TB, ideal for large file storage
- WD Red, Seagate IronWolf recommended for NAS
SSD (NVMe/SATA):
- Faster read/write, silent
- Ideal for cache, OS, or fast-access folders
Tip: Combine both — HDD for bulk storage, SSD for speed.
Step 3: Network Essentials for NAS Set Up
- Router: Gigabit (minimum), 2.5GbE or 10GbE preferred
- Ethernet: CAT6 or CAT7 cables for high-speed reliability
- Switch (optional): Unmanaged or managed switch with multi-Gig support if you have multiple devices
Why 10GbE Matters:
- Edit 4K/8K video directly from NAS
- Instantly transfer huge files
- Future-proofs your home network storage setup
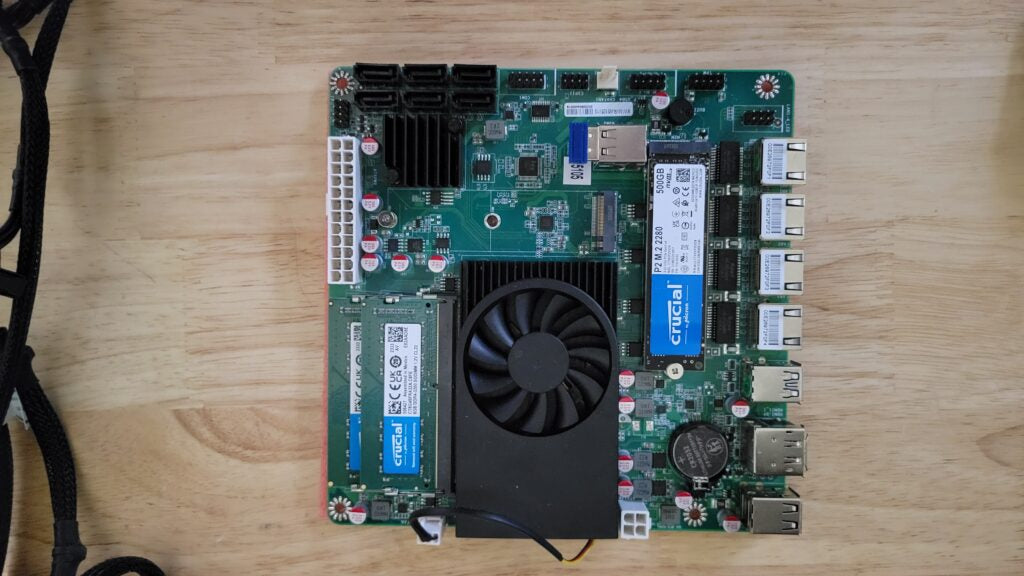
Step 4: Setting Up a NAS Server — Hardware Installation
Basic Assembly (DIY or Prebuilt NAS like LincStation N2):
- Install HDD/SSD into bays or M.2 slots
- Connect NAS to router via Ethernet
- Plug in power supply
- Boot up — most NAS auto-detect on the network
Step 5: Configure NAS — Initial Software Setup
NAS OS Options:
- Prebuilt NAS: Vendor OS (e.g., Synology DSM, QNAP QTS, LincOS)
- DIY NAS: Open-source options
- TrueNAS (FreeBSD-based, ZFS, highly secure)
- Unraid (Docker & VM focused)
- OpenMediaVault (Debian-based, lightweight)
Basic Configuration Steps:
1. Access NAS via browser (192.168.x.x)
2. Create Admin account + set strong password
3. Configure storage:
- Choose RAID (RAID 1, 5, 6, or SHR)
- Create storage pools and shared folders
4. Set up user accounts and permissions
5. Enable network protocols:
- SMB/CIFS (Windows)
- AFP (Mac)
- NFS (Linux)
6. Enable remote access (via VPN, HTTPS, DDNS)
Step 6: Configure NAS Security Best Practices
| Security Measure | Why It Matters |
|---|---|
| Strong admin password | Prevent brute-force attacks |
| Two-factor authentication (2FA) | Adds extra login protection |
| Disable unused ports | Minimize attack surface |
| Enable firewall | Block malicious traffic |
| VPN for remote access | Encrypted, secure file access |
| Regular updates | Patch vulnerabilities |
| Automatic snapshots | Rollback if attacked (e.g., ransomware) |
Step 7: Backup Strategies — NAS for Data Protection
Local Backup:
- Back up PCs, laptops, and phones to NAS automatically
NAS-to-NAS Backup:
- Mirror data to a second NAS at home or another site
Cloud Sync Backup:
- Sync NAS folders with Google Drive, Dropbox, or Backblaze B2 for off-site redundancy
3-2-1 Rule:
- 3 copies of your data
- 2 different mediums (e.g., NAS + external HDD)
- 1 off-site (e.g., cloud)
Step 8: Install NAS Applications to Extend Functionality
- Plex: Stream movies, videos, and photos
- Nextcloud: Private Dropbox/Google Drive alternative
- Jellyfin: Open-source media server
- Docker: Run apps like GitLab, WordPress, databases
- Surveillance: Turn NAS into a CCTV NVR system
- Time Machine/Windows Backup: Native backup for Mac and PC
Step 9: Remote Access — Your NAS Anywhere
- Set up VPN Server (e.g., OpenVPN, WireGuard)
- Enable DDNS (Dynamic DNS) for easy remote login
- Use vendor-provided mobile apps (e.g., LincOS, Synology Drive)
🔒 Tip: Always use HTTPS and VPN—never expose open SMB ports directly to the internet.
Step 10: Maintain and Monitor Your NAS Server
- Check disk health regularly (SMART monitoring)
- Update firmware and software monthly
- Clean dust and check temperatures
- Monitor logs for unusual activity
- Review user access permissions quarterly
Example Home NAS Setup: LincStation N2 Configuration
| Component | Specs |
|---|---|
| CPU | Intel N100 (4C/4T, 6W TDP) |
| RAM | 16GB LPDDR5 |
| Storage | 4× M.2 NVMe + 2× 2.5” SATA |
| Networking | 10GbE RJ45 built-in |
| Power Consumption | 10–15W idle |
| Use Case | Home NAS setup, video editing, backups, private cloud |
✅ Set up in under 30 minutes — Plug, Configure, Enjoy.
Common NAS Set Up Mistakes to Avoid
- ❌ No RAID = Data loss risk
- ❌ Weak passwords = Security breaches
- ❌ Exposing NAS directly to the internet without VPN = Hacking risk
- ❌ No backups of NAS itself = Single point of failure
- ❌ Using cheap non-NAS rated drives = High failure rate
The Future of NAS in 2025
- 🌐 Rise of personal cloud over public cloud
- 🔗 10GbE networking becoming standard for homes
- 💡 Integration with AI for file indexing, smart backups
- 🔒 Privacy-focused self-hosted solutions are on the rise
- 🔋 Ultra-low power NAS (like LincStation N2) for eco-conscious users
Conclusion: Your Home NAS Setup, Simplified
Setting up a NAS in 2025 is no longer just for tech geeks. With powerful, compact systems like the LincStation N2, anyone can enjoy the benefits of:
- ✅ Centralized storage
- ✅ Remote access
- ✅ Automated backups
- ✅ Media streaming
- ✅ Total data privacy
NAS server setup today means freedom from expensive cloud services, better security, and owning your digital life.
Commenta
Nota che i commenti devono essere approvati prima di essere pubblicati.
Questo sito è protetto da hCaptcha e applica le Norme sulla privacy e i Termini di servizio di hCaptcha.