
This guide is designed to install SSD. For more information, see the content below in this guide.
Please check the model of your notebook,and choose the correct steps as below:
LincPlus P1 & P2 SSD installation steps:
Note: the notebook must be turned off before installing the SSD
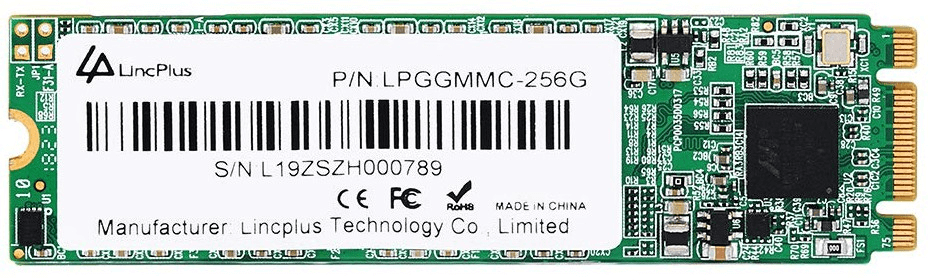
Compatible SSD: M.2 2280;B+M type;SATA interface (don't support NVMe and PCIe)
Friendly Tips: You can find LincPlus' 256GB SSD and 512GB SSD in our store. We suggest you choose LincPlus' SSD so that we can provide better technical support service and one year warranty service.
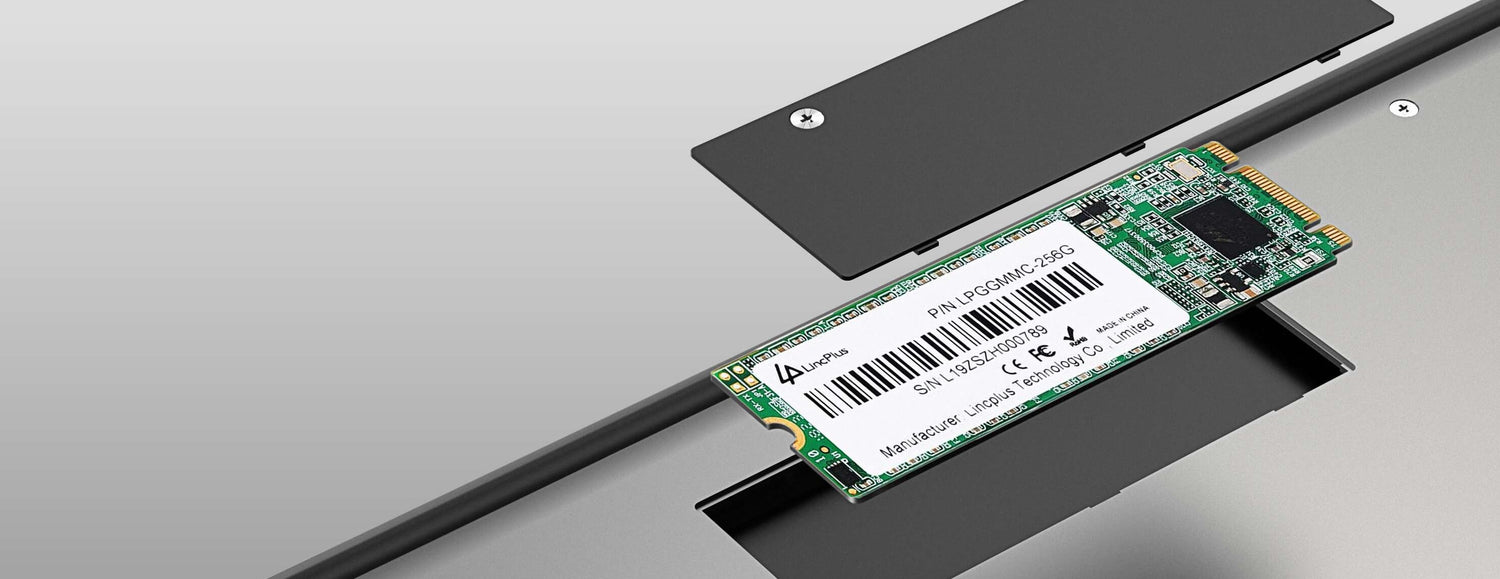
1.Find the SSD cover on the back of the laptop. Twist the SSD cover screw and remove the cover.
2.Insert the SSD into the interface, and screw it to fix the SSD. (PS: You should twist the screw on the left of the SSD, so that the SSD can be fixed well.)
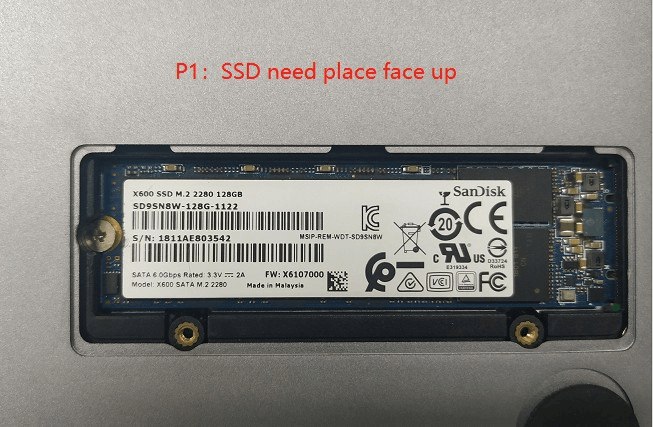
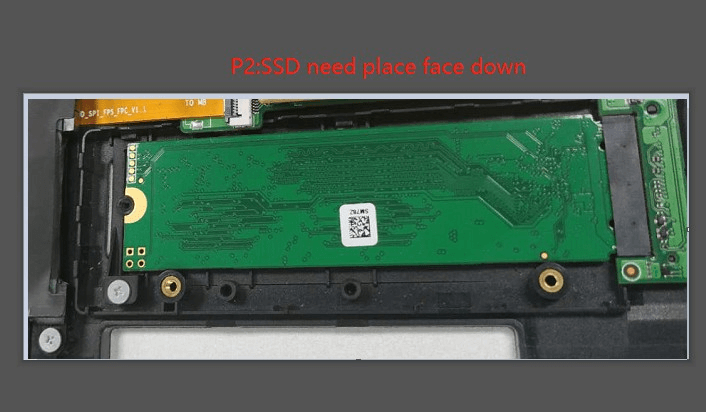
NOTE:please place the SSD face up on the P1 and face down on the P2, make no mistake, this is very important:
3.After assembly finished, close the SSD cover and tighten the screws.
LincPlus P3 SSD installation steps:
Note: the notebook must be shut down before installing the SSD
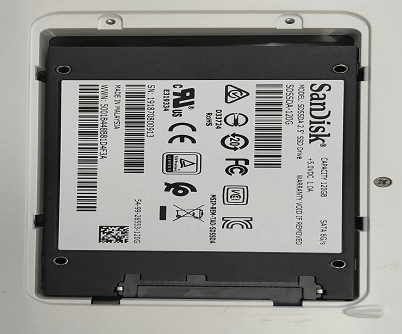
Compatible SSD: 2.5’’;SATA interface(Don’t support NVMe and PCIe),like this:

1.Find the SSD cover on the back of the laptop. Twist the SSD cover screw and remove the cover.
2.Insert the SSD into the interface, and screw it to fix the SSD:
3.After assembly finished, close the SSD cover and tighten the screws.
Now,the installation of SSD has finished,please turn on the notebook:
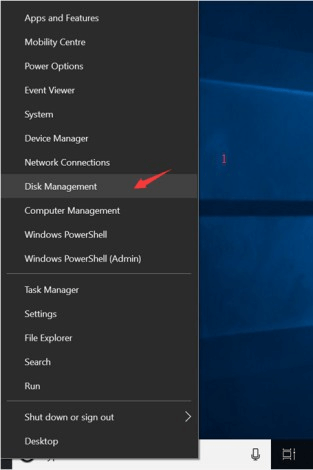
1.Find the Windows icon, (in the bottom left corner) right click it, and choose “Disk Management” to manage the new disk. Please see the following picture:
2.And then you can see the following picture appearing on the screen. Please click “OK”:

3.Right Click the New Disk(see the left picture), and choose “New Simple Volume...”:
4.Keep clicking “Next” until you see “Finish”.
5.Last you will see the SSD at “This PC”.
Please check the model of your notebook,and choose the correct steps as below:
LincPlus P1 & P2 SSD installation steps:
Note: the notebook must be turned off before installing the SSD
Compatible SSD: M.2 2280;B+M type;SATA interface (don't support NVMe and PCIe)
Friendly Tips: You can find LincPlus' 256GB SSD and 512GB SSD in our store. We suggest you choose LincPlus' SSD so that we can provide better technical support service and one year warranty service.
1.Find the SSD cover on the back of the laptop. Twist the SSD cover screw and remove the cover.
2.Insert the SSD into the interface, and screw it to fix the SSD. (PS: You should twist the screw on the left of the SSD, so that the SSD can be fixed well.)
NOTE:please place the SSD face up on the P1 and face down on the P2, make no mistake, this is very important:
3.After assembly finished, close the SSD cover and tighten the screws.
LincPlus P3 SSD installation steps:
Note: the notebook must be shut down before installing the SSD
Compatible SSD: 2.5’’;SATA interface(Don’t support NVMe and PCIe),like this:
1.Find the SSD cover on the back of the laptop. Twist the SSD cover screw and remove the cover.
2.Insert the SSD into the interface, and screw it to fix the SSD:
3.After assembly finished, close the SSD cover and tighten the screws.
Now,the installation of SSD has finished,please turn on the notebook:
1.Find the Windows icon, (in the bottom left corner) right click it, and choose “Disk Management” to manage the new disk. Please see the following picture:
2.And then you can see the following picture appearing on the screen. Please click “OK”:
3.Right Click the New Disk(see the left picture), and choose “New Simple Volume...”:
4.Keep clicking “Next” until you see “Finish”.
5.Last you will see the SSD at “This PC”.


Dejar un comentario
Todos los comentarios se revisan antes de su publicación.
Este sitio está protegido por reCAPTCHA y se aplican la Política de privacidad de Google y los Términos del servicio.