This guide is designed to install Linux and how to set the configuration on BIOS.For more info, see the content as below in this guide.
How to set BIOS
1. Insert the USB flash drive into the USB port of laptop. Turn on the laptop press
“Delete” until the BIOS setup interface display on the screen. (knock “Delete” continuously)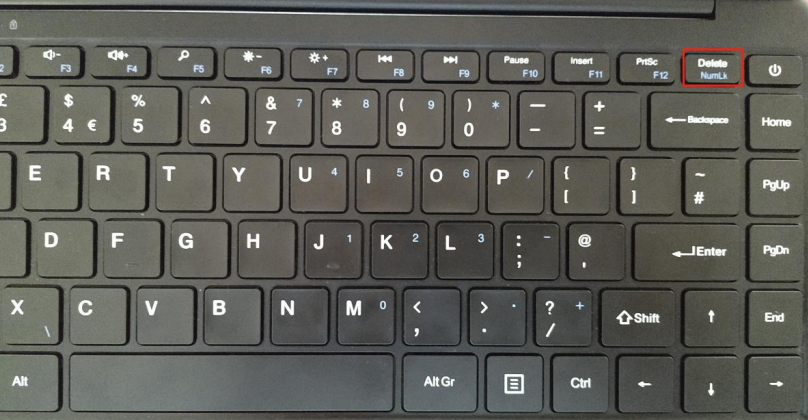
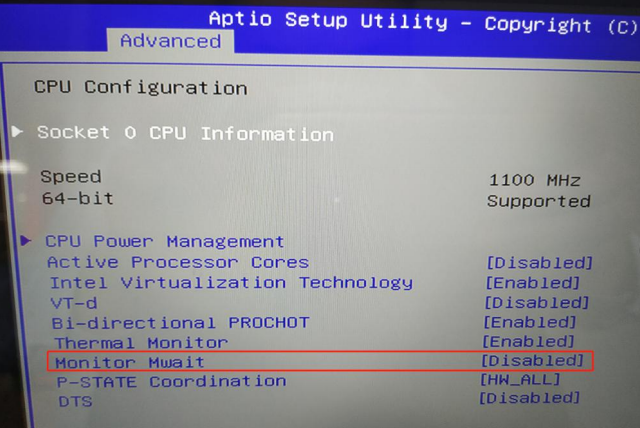
2. set "Advanced->CPU Configuration->Monitor Mwait" to "Disabled";
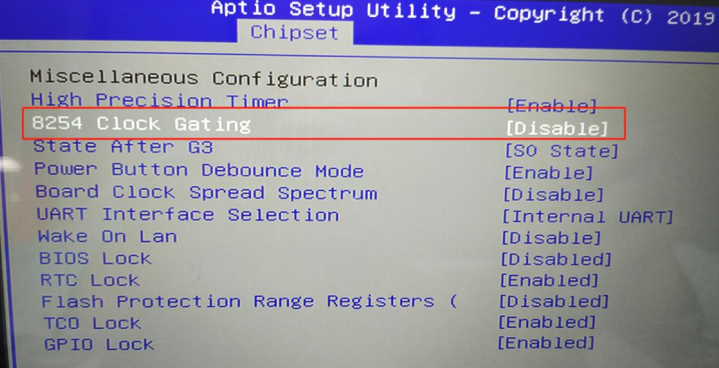
3. set"Chipset->South Cluster Configuration->Miscellaneous Configuation->8254 Clock Gating" to "Disabled";
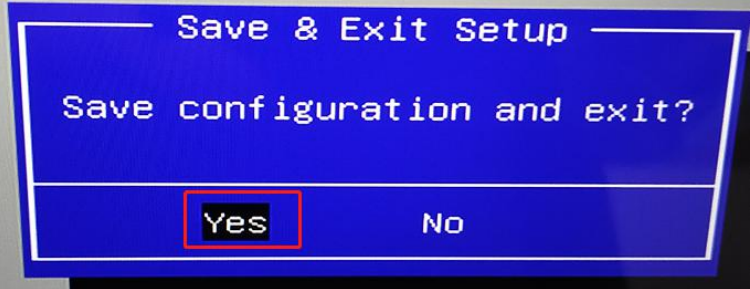
4. Press “F4” ,select “YES” and save the configuration;
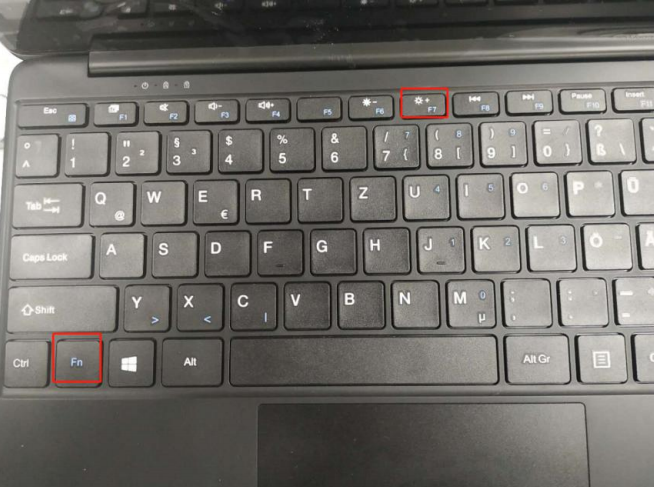
5. Insert the Linux USB flash boot drive into the USB port of laptop. Turn on the laptop and press "Fn" + "F7" until boot option appears in the screen. (hold down "Fn" and knock "F7" continuously)
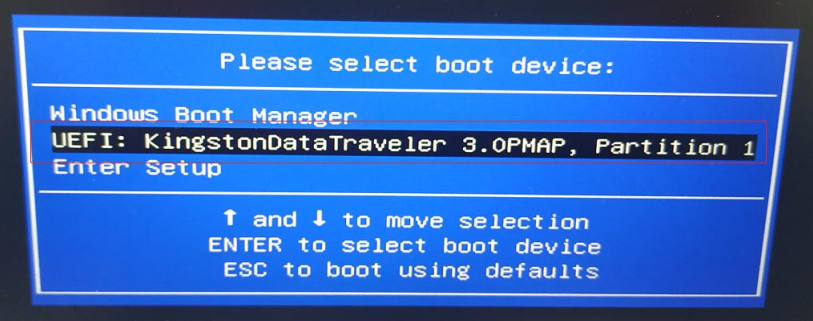
6. Then you can see the picture appears in the screen. You should choose your USB flash drive, and press "Enter": (My USB flash drive is KingstonDataTraveler, so that you can fix the OS out of from your
USB flash drive)

6. Then you can see the picture appears in the screen. You should choose your USB flash drive, and press "Enter": (My USB flash drive is KingstonDataTraveler, so that you can fix the OS out of from your
USB flash drive)
7. Now you can continue to install Linux on the laptop. NOTE:Recommend install ubuntu 18.04 and the later version,otherwise may have
trackpad unusable issue on the older version.


Dejar un comentario
Todos los comentarios se revisan antes de su publicación.
Este sitio está protegido por hCaptcha y se aplican la Política de privacidad de hCaptcha y los Términos del servicio.